• Thanks for stopping by. Logging in to a registered account will remove all generic ads. Please reach out with any questions or concerns.

RCN Carrier models

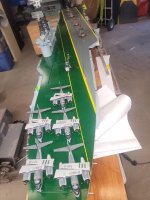
Sneaky bugger - gotta be Navy ;)
What carrier is that? Bonnie?
Yes! She's the Bonnie!

There might be a few other aircraft there which don't actually belong...the things I do to amuse myself.

(Can you imagine a CF-100 with folding wings on a Carrier deck? LOL)
 
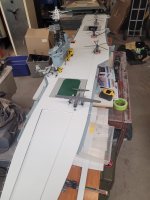
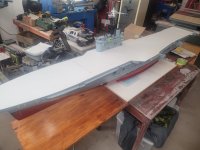
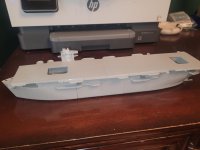
OK, here's where the Bonnie is at as of this evening.

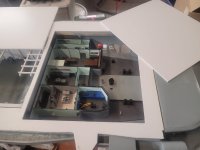
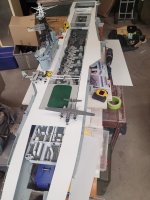
All of the flight deck inserts have been cut out.

The focsle one which allows access to the Anchor mechanism.

The main hangar bay insert.

The aft hangar (C Hangar).

The Aft workshop cutout which allows access to the rudder once you remove the workshop spaces.

I am getting close to the point where I'll be able to glue this flight deck onto the hull. That's a big step!!!
 

Attachments

  • Flight Deck all holes complete.jpg
    Flight Deck all holes complete.jpg
    275.9 KB · Views: 30
  • Overall view.jpg
    Overall view.jpg
    347 KB · Views: 31
  • Aft hole in flight deck open.jpg
    Aft hole in flight deck open.jpg
    226.6 KB · Views: 32
  • Flight Deck inserts removed.jpg
    Flight Deck inserts removed.jpg
    330.8 KB · Views: 31
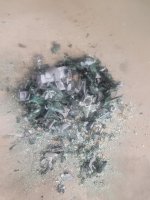
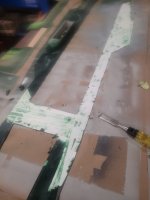
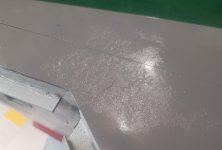
I spray painted the flight deck...and the paint bubbled...so I had to strip it. There was quite the pile of paint chips involved.

Someone suggested that oven cleaner does a good job stripping paint. I will observe that it does.
 

Attachments

  • Paint Chips.jpg
    Paint Chips.jpg
    80.4 KB · Views: 11
  • Deck Stripping.jpg
    Deck Stripping.jpg
    196.5 KB · Views: 11
  • Damn Part 3.JPG
    Damn Part 3.JPG
    83.7 KB · Views: 11
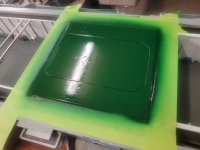
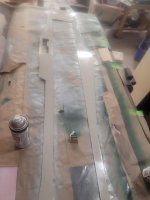
With the deck stripped, I then put light layers of paint on...basically one layer a week with a different brand of paint even. So, slow progress.
 

Attachments

  • 468336933_10159889758667242_721803802746749006_n.jpg
    468336933_10159889758667242_721803802746749006_n.jpg
    334.5 KB · Views: 7
  • Fresh paint layer 2.jpg
    Fresh paint layer 2.jpg
    253.1 KB · Views: 7
  • Deck Primed 2.jpg
    Deck Primed 2.jpg
    40.9 KB · Views: 7
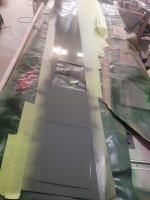
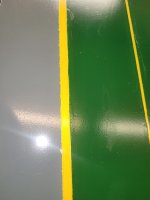
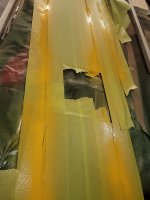
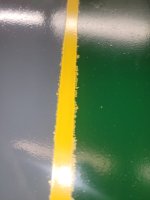
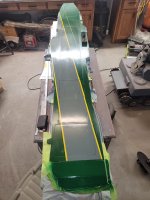
With the green and gray applied, it was time to add some yellow...alas, bleed under the edge of the tape, so...hand touch-ups engaged! I have to touch up the gray still.
 

Attachments

  • 468807207_10160043706162242_2368884276175438781_n.jpg
    468807207_10160043706162242_2368884276175438781_n.jpg
    228.9 KB · Views: 6
  • 468634960_10160043486272242_1542539233932110319_n.jpg
    468634960_10160043486272242_1542539233932110319_n.jpg
    410.6 KB · Views: 6
  • 468860316_10160043705657242_5706583592167126612_n.jpg
    468860316_10160043705657242_5706583592167126612_n.jpg
    172.3 KB · Views: 6
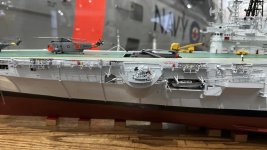
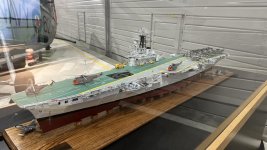
That said, a friend visited the Aviation Museum in Ottawa over the weekend and sent some inspirational photos of the model they have on display there.

Here's the link to the full album of his visit to the museum! Many thanks!
 

Attachments

  • 468883807_10162098947205460_7439931485329648418_n.jpg
    468883807_10162098947205460_7439931485329648418_n.jpg
    55.2 KB · Views: 21
  • 468870541_10162098715505460_1237064534819983284_n.jpg
    468870541_10162098715505460_1237064534819983284_n.jpg
    62 KB · Views: 21
With the green and gray applied, it was time to add some yellow...alas, bleed under the edge of the tape, so...hand touch-ups engaged! I have to touch up the gray still.
What kind of tape? I've had good results from the translucent Scotch tape, which seems to be less adhesive than the usual transparent kind. It can be pressed hard to prevent bleed, without lifting paint (Tamiya acrylics) when it's removed.
 
That said, a friend visited the Aviation Museum in Ottawa over the weekend and sent some inspirational photos of the model they have on display there.

Here's the link to the full album of his visit to the museum! Many thanks!
That is definitely a 3"/50 and not 40mm Bofors
 
What kind of tape? I've had good results from the translucent Scotch tape, which seems to be less adhesive than the usual transparent kind. It can be pressed hard to prevent bleed, without lifting paint (Tamiya acrylics) when it's removed.
Standard green painter's tape - consider I'm trying to paint a 7 foot flight deck, and so Tamiya acrylics (if used) would require industrial amounts.

To be honest, I'm now using Tremclad paint. It's not 100% accurate in colour, but TBH, it's close enough for me, and my opinion is that anyone who's built a better model of the Bonnie is able to correct me....in the meantime, anyone else should point to their 7+ foot model ship and tell me how they did it better on theirs. :-)

And yes, Bonnie had 4x 3"50 mounts in her early configuration (1957-1965) as depicted in the model at the Aviation Museum. I'm building the late version, where the forward gun sponsons were removed and forward boat bays enclosed because of the damage they kept getting due to the North Atlantic.
 
Standard green painter's tape - consider I'm trying to paint a 7 foot flight deck, and so Tamiya acrylics (if used) would require industrial amounts.
I can confirm I don't get results as satisfactory with masking/painter's tape. Paint type shouldn't matter, but consistency (watery/not) is probably key.
 
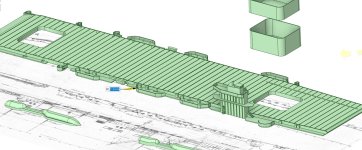
In case anyone is interested, since it's quite cool in the garage right now, I'm doing some 3D design work, and am in the process of creating a 3D printable model of the HMS Puncher - a WW2 Escort Carrier that was owned by the Brits, and operated by Canada.

The hull is a modification from one of the Liberty Ship hulls that's available on Thingiverse, extensively adjusted with the flight deck created from scratch using original blueprints.

I've printed a 1/350 scale test version that I'm using to refine the project.

Intent is to release the file set as a complete printable package, for you to print your own 1/144 scale RC aircraft carrier.

Guestimate is that it'll be about 2 weeks of printing, and she'll come in just shy of a meter long, and will take about 2 Kg or so of filament to print.

So, for about $60 you can print your own RCN Aircraft carrier!

I'm working my way around the flight deck edge adding details tonight....give me a week or two to finish up the files before I do a test print - then I'll assemble of the Christmas break.
 

Attachments

  • 350 Scale Puncher.jpg
    350 Scale Puncher.jpg
    118.9 KB · Views: 12
  • Flight Deck V3.JPG
    Flight Deck V3.JPG
    166.9 KB · Views: 12
  • Puncher 3D design.jpg
    Puncher 3D design.jpg
    39.7 KB · Views: 12
I can confirm I don't get results as satisfactory with masking/painter's tape. Paint type shouldn't matter, but consistency (watery/not) is probably key.
I get good effect by not painting, but gently stippling with an almost dry brush and building it up in layers. I do that when doing things like highway centre line stripes. On larger areas you use the stippling at the edge of the tape and a more normal laydown of paint away from the tape.

🍻
 
I find that a layer of clear flat before the final colour helps control paint bleeding.
 
I was speaking to a well known Sea King pilot who flew off the Bonnie. I'm still not sure what was done in Ops and what was done in the Carrier ATC Center...

However, he did confirm that very little of the positioning of the inner screen (ie the Sea Kings) was done by the helicopters themselves. Which is contrary to what some other pilots have indicated.

Any interest in doing the models for the afformentioned spaces? Maybe as a stand alone cutaway to go with our Bonnie?
 
In case anyone is interested, since it's quite cool in the garage right now, I'm doing some 3D design work, and am in the process of creating a 3D printable model of the HMS Puncher - a WW2 Escort Carrier that was owned by the Brits, and operated by Canada.

The hull is a modification from one of the Liberty Ship hulls that's available on Thingiverse, extensively adjusted with the flight deck created from scratch using original blueprints.

I've printed a 1/350 scale test version that I'm using to refine the project.

Intent is to release the file set as a complete printable package, for you to print your own 1/144 scale RC aircraft carrier.

Guestimate is that it'll be about 2 weeks of printing, and she'll come in just shy of a meter long, and will take about 2 Kg or so of filament to print.

So, for about $60 you can print your own RCN Aircraft carrier!

I'm working my way around the flight deck edge adding details tonight....give me a week or two to finish up the files before I do a test print - then I'll assemble of the Christmas break.

Are you going to put the hole in the port quarter where the torpedo struck?
 
I was speaking to a well known Sea King pilot who flew off the Bonnie. I'm still not sure what was done in Ops and what was done in the Carrier ATC Center...

However, he did confirm that very little of the positioning of the inner screen (ie the Sea Kings) was done by the helicopters themselves. Which is contrary to what some other pilots have indicated.

Any interest in doing the models for the afformentioned spaces? Maybe as a stand alone cutaway to go with our Bonnie?
That tracks with my understanding of the 1960s employment of a Sea King.
 
Back
Top